
Common Challenges in Vertical Injection Molding and How to Overcome Them
A production line is running well until, without warning, a batch of insert-molded connectors starts showing hairline flash along the parting line. The operator adjusts clamping pressure, the next shot looks fine, then two hours later the problem returns. Nobody changed the material. Nobody changed the mold. Something in the process shifted just enough to tip good parts into scrap.
This is a familiar scene on shop floors that run insert molding, overmolding, or small-footprint precision parts. Common challenges in vertical injection molding rarely come from one obvious cause — they usually come from several small variables (mold condition, material handling, machine repeatability, operator technique) drifting together. Vertical machines add a layer of complexity that horizontal machines don’t face in the same way, because inserts are loaded manually or semi-automatically into a mold that sits in a fixed, gravity-assisted orientation.
The good news is that almost every one of these problems is traceable and fixable. This article walks through the most common issues manufacturing teams run into, why they happen, and practical ways to fix and prevent them.
Key Takeaways
- Most vertical injection molding defects — flash, short shots, warpage, dimensional inconsistency — trace back to a small set of root causes: clamping/pressure mismatch, uneven cooling, material moisture, or mold wear.
- Insert misalignment is the most vertical-specific challenge, and is best controlled with tight insert nests, standardized loading, and vision-based verification before the mold closes.
- Machine repeatability and cycle-count-based preventive maintenance set the ceiling on how stable and consistent your process can stay over time.
What Is Vertical Injection Molding?
Vertical injection molding machines inject material downward into a mold mounted horizontally on a stationary platen, with the injection unit moving vertically above it — the opposite orientation of a horizontal machine, where the mold clamps side by side and the barrel injects sideways.
That orientation matters for one main reason: it gives an operator direct, top-down access to the open mold, making it far easier to place metal inserts, wire terminals, connector pins, or pre-formed components into the cavity by hand or with a pick-and-place unit before the mold closes.
Because of this, vertical machines are the standard choice for:
- Insert molding — encapsulating metal or plastic components inside a molded part
- Overmolding — applying a second material layer over a substrate, such as a soft-touch grip over a rigid handle
- Rotary and multi-station molding, where several molds index under one injection unit for continuous insert loading
Vertical machines also have a smaller footprint than horizontal machines of comparable tonnage — useful where floor space is limited but part complexity is high, such as automotive connectors, electronic switches, and medical device components.
Common Challenges in Vertical Injection Molding
Here’s a practical breakdown of the issues that come up most often, why they happen, and how to overcome vertical injection molding challenges before they turn into scrap or downtime.
1. Flash
Problem: A thin, unwanted layer of material appears along the parting line or around inserts.
Why it happens: Flash occurs when molten material escapes through a gap that shouldn’t exist — usually insufficient clamping force, worn parting line surfaces, or contamination between the mold halves.
How to overcome it: Check clamping tonnage against the shot’s actual projected area, inspect the parting line for wear or debris, and confirm the mold is fully seated before every cycle.
How to prevent it: Build parting-line cleaning and clamp-force checks into routine maintenance, and match machine tonnage to the mold rather than running at the lower edge of a machine’s rated capacity.
2. Short Shots and Incomplete Filling
Problem: Parts come out with unfilled sections, especially in thin walls or areas far from the gate.
Why it happens: Insufficient injection pressure or speed, a gate or runner too small for the material viscosity, low melt temperature, or trapped air resisting fill.
How to overcome it: Increase injection pressure or speed incrementally, review gate location and size, and check that venting is adequate at the last-to-fill areas.
How to prevent it: Validate mold filling during tooling design with fill simulation where possible, and document injection profiles per part number so operators aren’t guessing after a changeover.
3. Insert Misalignment and Shift
Problem: Inserts move out of position during injection, resulting in exposed metal, cracked plastic around the insert, or rejected parts.
Why it happens: This is one of the most vertical-specific challenges — typically manual placement error, worn locating pins or nests, or injection pressure pushing the insert before the material sets around it.
How to overcome it: Inspect and replace worn locating features, standardize insert-loading procedure with a visual check step, and reduce initial injection velocity so the melt doesn’t shift the insert on first contact.
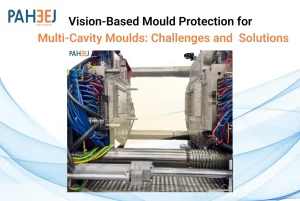
How to prevent it: Use insert nests with a tight, repeatable fit, and consider a vision-based verification step before the mold closes — exactly the kind of positioning error a mould protector vision camera system is designed to catch before it causes tooling damage or a scrapped part.
4. Warpage
Problem: Finished parts twist, bow, or don’t sit flat once ejected and cooled.
Why it happens: Uneven shrinkage across the part, usually from inconsistent wall thickness, uneven cooling, or packing pressure that isn’t held long enough for even solidification.
How to overcome it: Adjust packing time and holding pressure, review cooling channel layout for hot spots, and check wall thickness against the original design intent.
How to prevent it: Design parts with consistent wall thickness from the start, and validate cooling balance in the mold before full production.
5. Uneven Cooling
Problem: Some areas of the part cool and shrink at a different rate than others, contributing to warpage, sink marks, or dimensional variation.
Why it happens: Cooling channels too far from the cavity surface, blocked or scaled channels, or a cooling circuit not designed for the part’s geometry.
How to overcome it: Clean and inspect cooling lines for scale buildup, verify coolant flow rate and temperature at each circuit, and use thermal imaging if warpage patterns suggest a specific hot zone.
How to prevent it: Schedule regular flushing of cooling channels and monitor the coolant temperature differential between inlet and outlet as an early warning sign of restriction.
6. Material Moisture and Contamination
Problem: Parts show splay marks, brittleness, or bubbles, and mechanical properties fall short of spec.
Why it happens: Hygroscopic materials like nylon or polycarbonate absorb moisture from the air during storage. Mixed regrind, dust, or incompatible additives can cause similar defects.
How to overcome it: Dry material to the resin supplier’s specification, and confirm drying equipment temperature and dwell time are actually being met, not just set.
How to prevent it: Store hygroscopic resins in sealed containers or a dedicated dry area, and keep clear labeling and separation between material grades to avoid cross-contamination.
7. Cycle-Time Variation
Problem: Cycle times drift from shot to shot, making throughput unpredictable and complicating scheduling.
Why it happens: In insert molding this is often tied to inconsistent manual loading speed, but it can also come from cooling time variation, hydraulic response drift, or inconsistent ejection.
How to overcome it: Time each phase of the cycle separately — injection, cooling, ejection, insert loading — to isolate where the variation is actually occurring.
How to prevent it: Where volumes justify it, automate insert loading to remove operator-paced variability, and use a machine with strong shot-to-shot repeatability.
8. Mold Wear and Maintenance Gaps
Problem: Parts that were dimensionally correct for months start drifting out of tolerance, or flash and sticking appear more frequently.
Why it happens: Every mold wears — guide pins, ejector pins, parting line surfaces, and insert locating features degrade with cycle count. Reactive maintenance lets small wear issues become quality problems.
How to overcome it: Pull the mold for inspection against its maintenance schedule rather than waiting for a defect to appear, and replace wear components once they’re near tolerance limits.
How to prevent it: Track cycle counts per mold and set maintenance intervals from that data, not a calendar guess. Preventive maintenance is consistently cheaper than a mold crash.
9. Dimensional Inconsistency
Problem: Parts pass inspection on some shots and fail on others, without an obvious pattern.
Why it happens: Usually the cumulative result of several issues above — shrinkage variation, cooling imbalance, packing inconsistency, or machine repeatability — rather than one single cause.
How to overcome it: Review process data across shots, not just spot checks, to find where variation concentrates, and isolate one variable at a time.
How to prevent it: Use statistical process control on critical dimensions, and lock process parameters into a setup sheet per mold so changeovers don’t reintroduce solved variation.

How Machine Selection Affects Molding Problems
Much of the troubleshooting above assumes the mold and process are the variables — but the machine sets the ceiling on how consistent that process can be:
Factor | Why It Matters |
Clamping force | Undersized clamping relative to the part’s projected area is a direct cause of flash, regardless of how well the mold is maintained. |
Injection pressure and speed | Machines with a narrow, imprecise control range make it harder to dial in fill without risking short shots on one end or flash and burn marks on the other. |
Repeatability | Shot-to-shot consistency in pressure, speed, and position is what keeps dimensional variation and cycle-time drift under control across a production run. |
Mold compatibility | Platen size, tie-bar spacing, and ejector configuration need to match the mold — a mismatch forces compromises that show up as quality problems later. |
Insert handling and automation | Machines built with insert molding in mind — accessible mold area, compatible cycle logic, room for pick-and-place tooling — reduce insert misalignment and cycle-time variability compared to machines adapted after the fact. |
None of this means every problem requires a new machine. But when the same defect keeps recurring despite process and mold adjustments, it’s worth checking whether the machine’s specifications actually match the part.
Best Practices to Prevent Vertical Injection Molding Problems
A simple, repeatable checklist prevents more defects than chasing problems after they appear:
- Machine setup — Confirm clamping tonnage matches the mold’s projected area before every job change.
- Mold maintenance — Inspect parting lines, guide pins, ejector pins, and insert nests on a cycle-count-based schedule.
- Material preparation — Dry hygroscopic resins to spec and verify actual dryer performance, not just the setpoint.
- Process monitoring — Track injection pressure, speed, and cycle time across shots to catch drift early.
- Insert positioning — Standardize loading procedure and inspect locating features; consider automated verification for high-value tooling.
- Cooling — Flush and inspect cooling channels on a schedule, and monitor coolant temperature differential.
- Quality inspection — Use in-process checks on critical dimensions rather than relying solely on final inspection.
- Preventive maintenance — Document wear-part replacement intervals per mold based on actual cycle history.
How Paheej Machinery Helps Manufacturers
Paheej Machinery Private Limited is your trusted partner for advanced injection molding solutions, specializing in the supply and support of multi-component, all-electric, and vertical injection molding machinery. As an authorized Indian sales and service representative for established global machine brands from Japan, Portugal, Germany, Taiwan, and China, Paheej connects Indian manufacturers with proven international machine technology, backed by local sales support, service, and after-sales care.
Paheej’s stated mission is to be a one-stop solution for plastic processing machinery — helping manufacturers source the right equipment rather than pushing a one-size-fits-all setup. The vertical injection molding machine range Paheej supplies spans 15 to 500 tons, covering small precision connectors through larger insert-molded automotive and industrial components, with accessible mold access for insert loading and the clamping and injection control needed to hold tight tolerances across long production runs.
For manufacturers dealing with insert positioning and mold protection risk specifically, Paheej also supplies a mould protector vision camera system that adds a verification layer, catching misaligned inserts, incomplete slide or lifter return, and foreign material before the mold closes — directly addressing several defect categories covered above.
Paheej also emphasizes understanding each client’s specific requirements and delivering customized solutions rather than off-the-shelf configurations, backed by ongoing technical support. If you’re evaluating whether your current setup fits your part mix, Paheej’s team can walk through tonnage, mold compatibility, and automation options for your application.
Conclusion
Most vertical injection molding problems trace back to a handful of root causes: clamping and pressure mismatches, mold wear, insert handling, cooling imbalance, and material preparation. None are mysterious once you know where to look, and the fix is rarely a single dramatic change — it’s usually tighter process monitoring, a maintenance schedule based on actual mold usage, and a machine genuinely matched to the part being produced.
Paheej Machinery works with manufacturers across automotive, electronics, medical device, and consumer goods production on exactly these challenges, supplying vertical injection molding machines suited to accessible insert loading, tight tolerances, and long-term reliability. If recurring defects, insert positioning issues, or inconsistent cycle times are affecting your line, it’s worth reviewing whether your current machine and mold setup still fit your application.
Frequently Asked Questions (FAQs)
1. What is the difference between a vertical injection molding machine and a horizontal one?
A vertical injection molding machine clamps the mold horizontally with the injection unit moving down into it, giving open, top-down access to the cavity. A horizontal machine clamps the mold side by side and injects sideways. That open access is why vertical machines are the standard choice for insert molding and overmolding.
. What causes the most defects in vertical injection molding specifically?
Insert-related issues — misalignment, shift during injection, and inconsistent loading — since the process depends on accurate manual or semi-automated insert placement in a way horizontal molding typically doesn’t.
. How do I choose the right industrial injection molding machine for insert molding?
Match clamping force and injection control to the mold’s actual requirements, confirm the machine offers accessible insert loading and strong shot-to-shot repeatability, and check that platen size and ejector configuration are compatible with your tooling rather than picking based on tonnage alone
4. How often should a mold be inspected to prevent wear-related defects?
Base intervals on cycle count rather than a calendar schedule — wear on guide pins, ejector pins, and insert nests tracks with production volume, not time elapsed.
Is warpage always a mold design problem?
Not always. Uneven wall thickness is a common cause, but warpage can also stem from cooling imbalance or insufficient packing pressure — process adjustments rather than mold redesigns.